You can easily add names and titles on screen for people in your videos with EziEdit, and have them appear in your brand’s colour and font.
These are called Lower Text.
And you can also add text across the bottom of the screen, such as questions or thematic highlights.
You can create as many Lower Text templates as you like, which can then be accessed by anyone logged in to your Studio Bucket for them to instantly use when they EziEdit a video, for both ease of use and consistency for your brand.
To add your organisation’s branding, you will need to first know your text font and colour, plus background colour.
For your font, you will need your actual font file to upload to EziEdit, while you can create and add your brand colours easily within EziEdit.
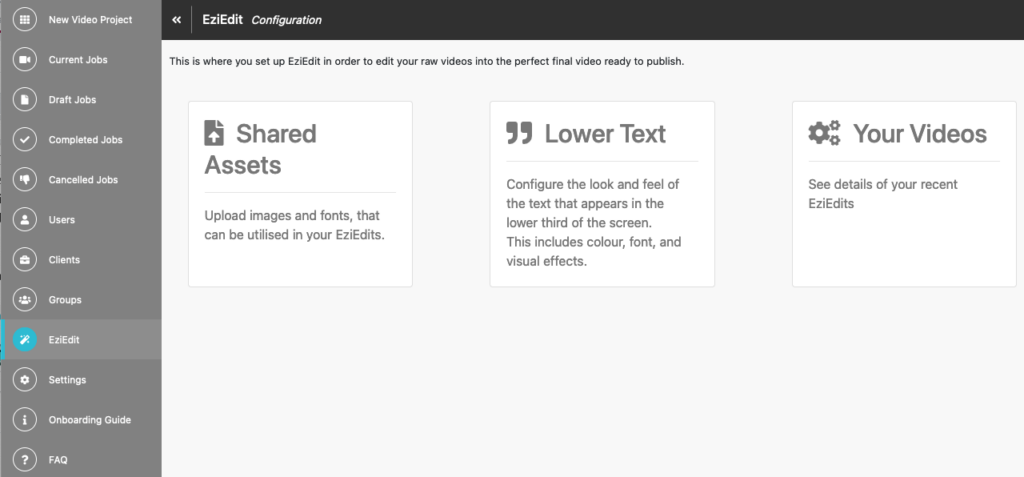
First, login to your Studio Bucket platform, and from the left hand side menu items, select EziEdit.
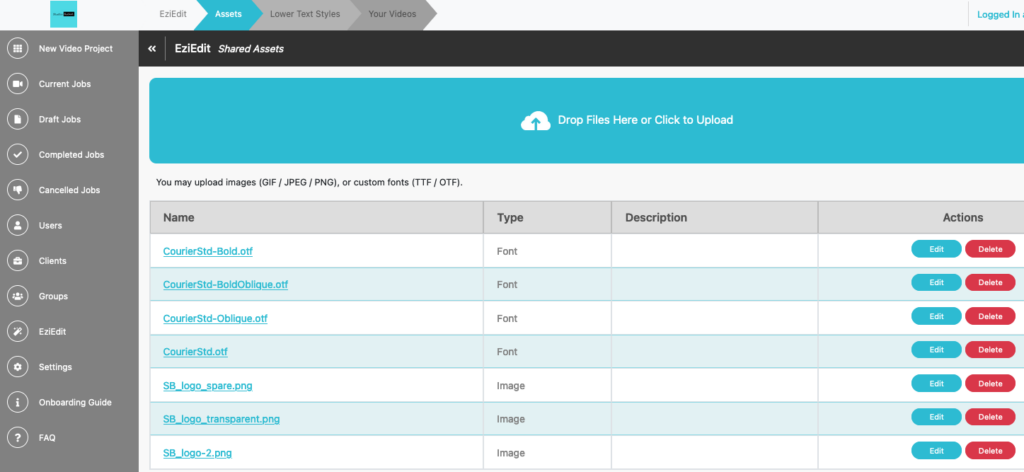
Next, to upload and use your brand’s font, click Shared Assets.
Either drag and drop, or click on the blue rectangle to select files from your computer to upload. To help locate these files on your device, the common font file formats are TTF or OTF.
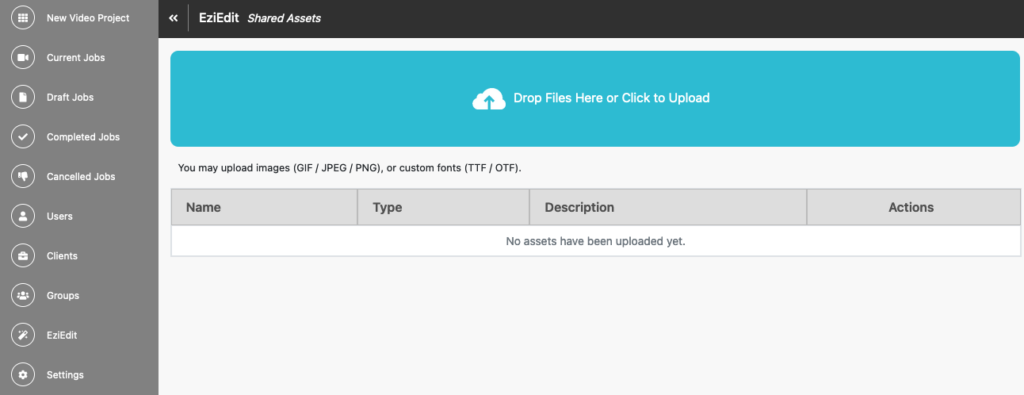
You will see your fonts listed as they upload. While you’re here, you could also upload your logo or any other frequently used screens, such as a title page, your logo as a full screen to end your video, or a Disclaimer or Terms and Conditions screen. Basically, any file that could be useful to use in your EziEdits, you should upload to this Shared Assets section.
Upload images in any of 3 formats – JPEG, PNG or GIF.
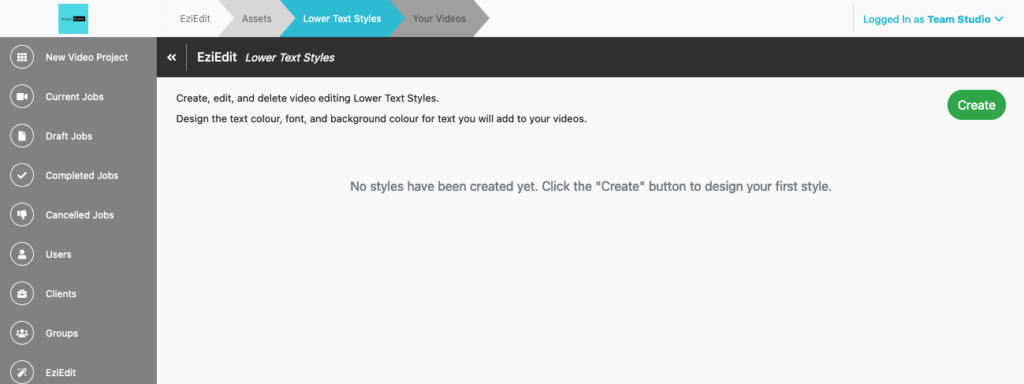
Now you’re ready to create your first template for Lower Text.
Click the green Create button to design your first style.
In the General section at the top, Give your Lower Text Style a name, such as MyCompanyName Default
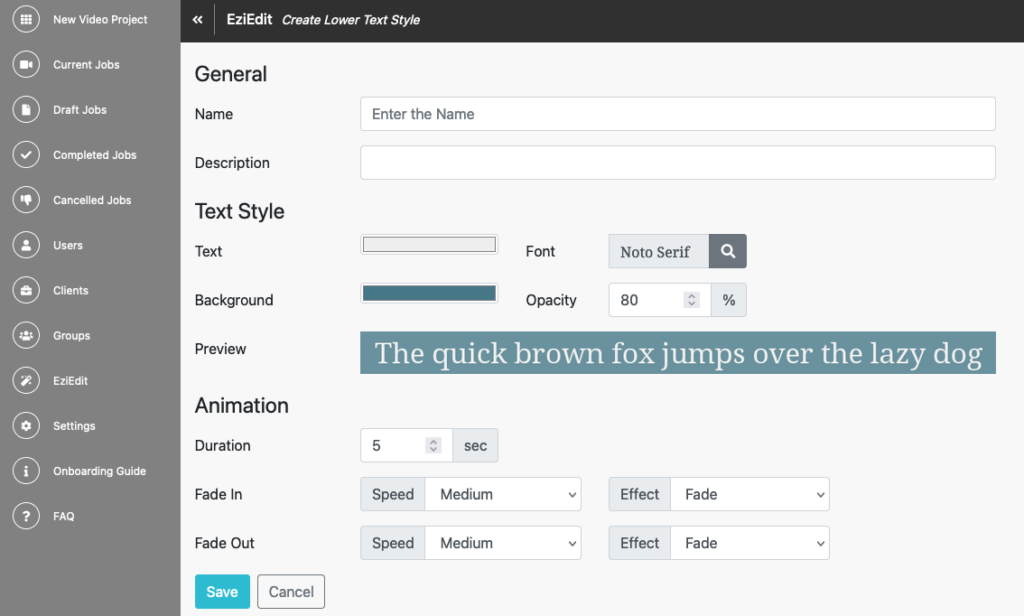
The next Text Style section is to create the colour of your actual text. Click on the Text rectangle to activate the popup for your colour selection.
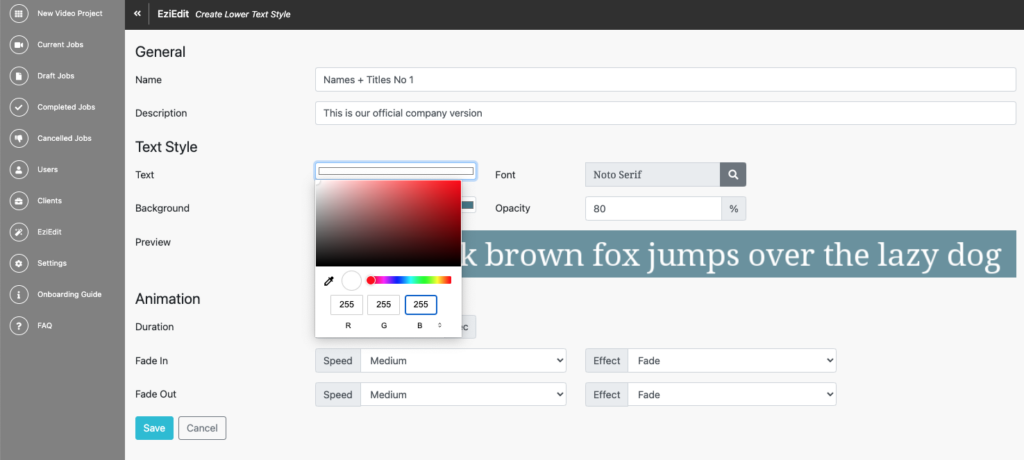
This will show the RGB (Red Green Blue) selection box, for you to enter the combination for your brand’s text colour.
For example, plain white text would be R 255 G 255 B 255.
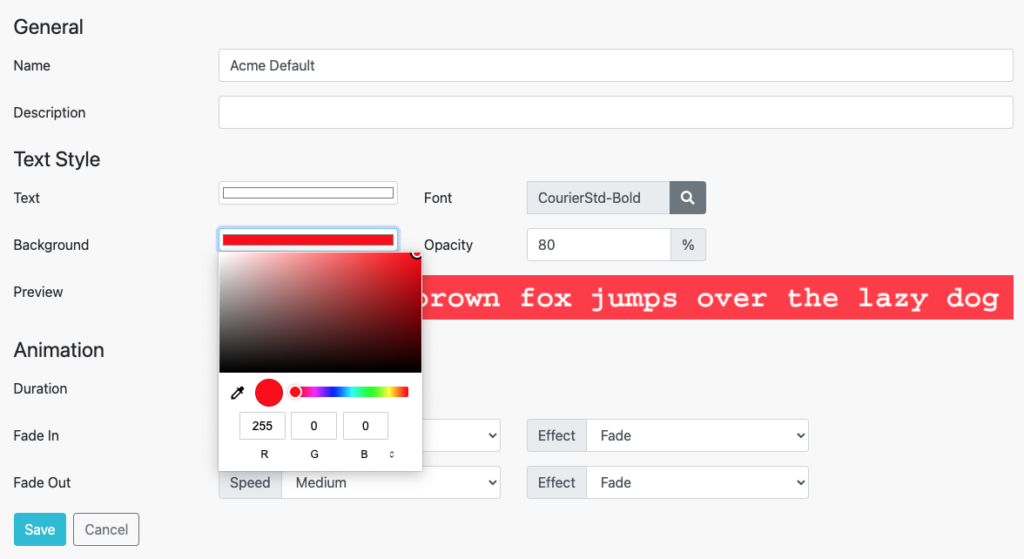
To change the background colour to your brand’s, follow the same process as for text.
In the Text Style section click on the Background rectangle to activate the popup for your colour selection.
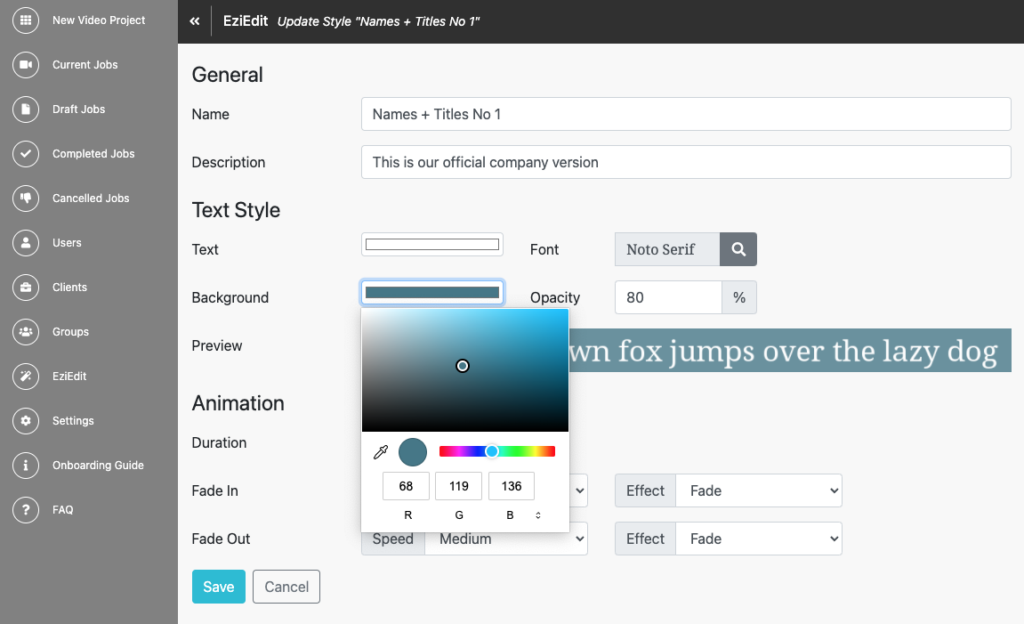
This will show the RGB (Red Green Blue) selection box, for you to enter the combination for your brand’s text colour. For example, a red background colour would be R 255 G 0 B 0.
Once you’ve added your colour for both Text and Background, click Save.
Now that your colours are sorted, we turn to how the name, plus maybe job title, of your talent will appear across the bottom of your video.
How long do you want the name and title to be on screen?
And do you want it to fade on, wipe on or slide on? Don’t worry, we’ve set a default so you don’t have to do anything – it will just work as is.
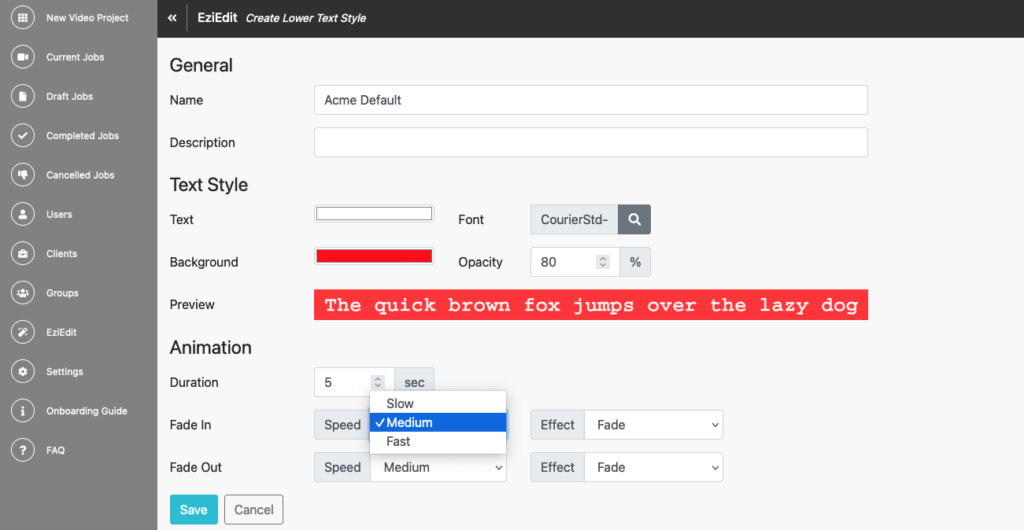
The default Duration time on screen is 5 seconds. If you’re happy with that, you don’t have to do anything. This means the name or name + title of the person speaking will come on at the bottom of screen for a total of 5 seconds.
Otherwise to adjust, go to Animation, then Duration and then use the up/down arrows to increase/decrease the time on screen.
Tip: when you have a video with numerous people, and they are flashing up on screen for short appearances like a ‘vox pop’ style video, then you may want their names to come on screen for only 2-3 seconds. This is a good example of when to create and save a second Lower Text Style for these videos, so it’s always there as an option for your and any of your colleagues to instantly use.
This way anyone using EziEdit on your platform, when they come to add their Lower Text, will have the drop down option of your brand’s default Lower Text which comes on screen for 5 seconds like most videos, OR a second Lower Text template for which the names and titles of people in the video appear for say 3 seconds.

Now, back to your Lower Text template, you have 3 options for how quickly your lower text appears on screen, Slow, Medium or Fast, with the do-nothing default on the platform being Medium.
You also have 3 options for the Effect of your Lower Text. They are Fade, Slide or Wipe, with the default being Slide.
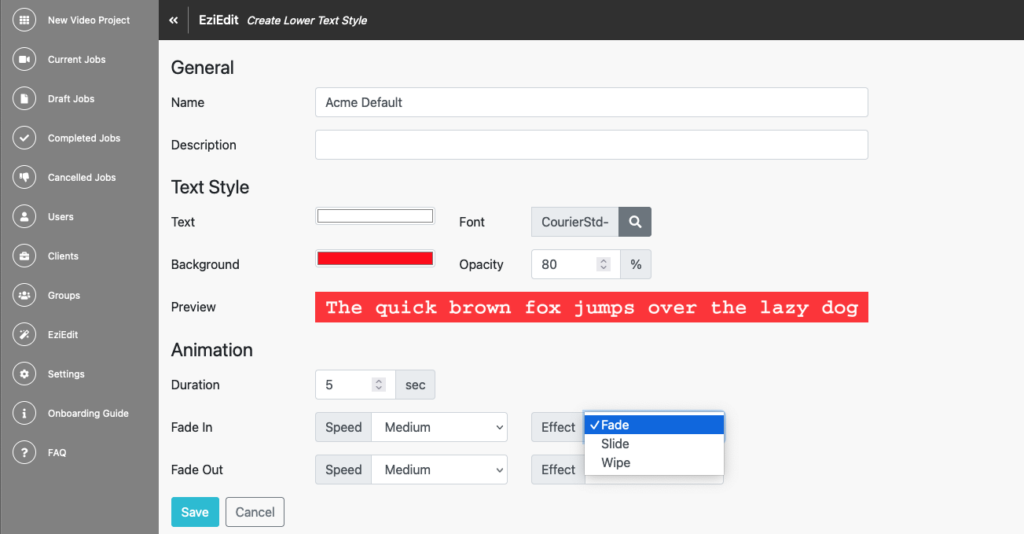
Tip: use Fade if you are creating a Lower Text style for a series of names flashing quickly up on screen like for the vox pop style discussed above. Use Slide or Wipe for traditional name + title style. Have a play to Create a Lower Text with each of them to see which you prefer, or to give you a variety of styles for your brand to instantly use at any time.
For the final Fade In and Fade Out selections, for Speed you can choose Slow, Medium or Fast, with the default being Medium.
Then for the speed at which your Lower Text comes on and leaves the screen, you have Medium as a default setting if you do nothing, or else there also is Fast and Slow options.
Traditionally, your Fade In and Fade Out are the same style.
Now you can Save your Lower Text style.
You can revise it at any time but selecting Edit (bottom left). Otherwise Close to return to your Lower Text Styles menu.
To make another Lower Text Style, begin again by clicking Create (top right)
You can create as many as you need.
Note – there is a default text and colour combo, so if adding a specific font and colour to your text on your video isn’t important at this time, you can proceed with your edit without doing anything. Your on screen text will look like this: