Chrome or Microsoft Edge browser to access the internet
Let’s begin
Your project manager will email you a link. When you are ready to record, click on the link OR copy and paste it into Chrome or Edge.
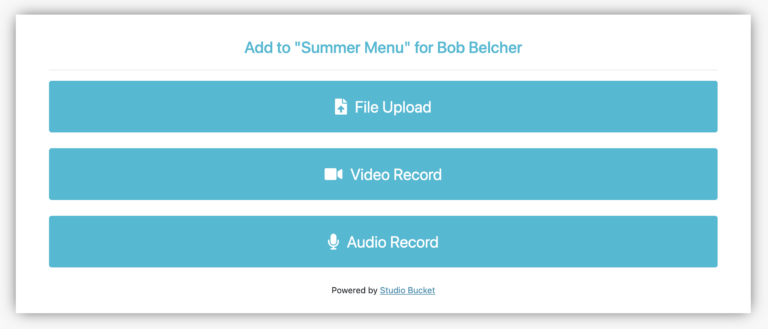
You will see a screen like this, giving you the option to record Video, or Audio, or upload any other files:
Step 2
Select whether you want to Video Record, Audio Record or File Upload.
It may ask you to Allow your camera and microphone on your device to be accessed by Studio Bucket. Click accept.
For Video Record you have the option to record using our teleprompter, or you can record normally.
Step 3
Check yourself out. What You See Is What You Get. You can rotate your device and chair in a circle, and see when your face looks most brightly lit.
Framing
Sit naturally in your chair facing your screen. Aim for not too much head room on the screen. Check out your background – anything messy or that you would rather not see on camera?
Lighting
It’s best to have the light from any windows shining into your face to help you look great. If filming at night or in a dark room, switch on the room lights, and try and position a desk lamp shining into your face. Play around to see what lamp and light positions makes your face look better on camera.
Screen Height
Aim for the top of your screen to be level with your eyeline. If you are using a laptop, try propping it up on a box on its vertical end (or half a dozen books) to get it up level with your face.
TIP
If you’ve got your back against a window, that will be a problem. The solution, if possible, is to turn your device around so that you are facing towards the window, so your device has its back to the window.
Audio
Your device will record you via its native microphone. Is the area quiet? Is there much echo in the space you’re recording? (hard floors or high ceilings)
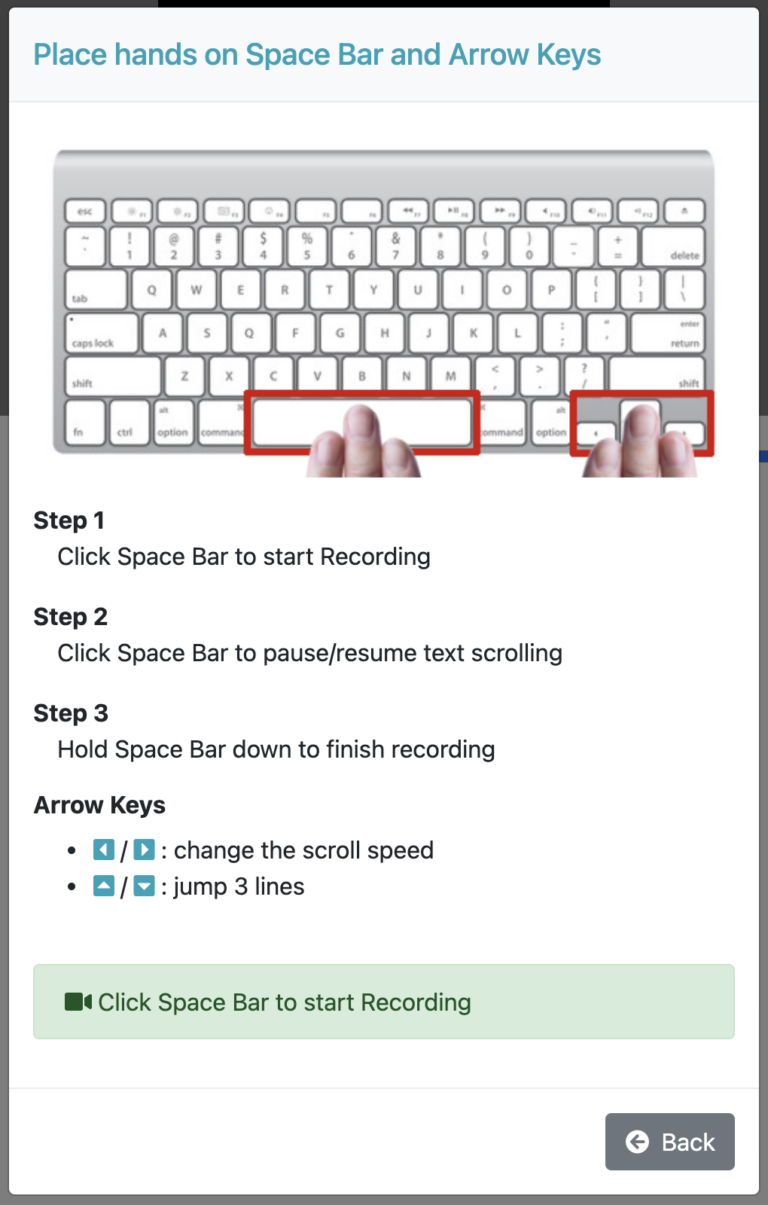
Now you’re ready to record. Click your Space Bar to begin recording. There is a “3-2-1” countdown and then the recording will start.
After Recording
When you’re finished recording, hold down the Space Bar and keep looking at the camera for another second or two as your recording automatically stops.
You can then Preview your recording, and decide whether it’s good to Upload or you’d prefer to Discard and record again.
Once you click Upload, you will see your progress via the live counter, and then receive confirmation of 100% upload success.
This means your recording has landed in the project. Well done.
Finally, you’ll have the option to Record Again, or end your session.